|
This guide is an
explaination of how to install the Phoenix Tuning Rear Disc Conversion
for the Toyota Corolla. This is not a replacement to a repair manual or
a professional mechanic. Phoenix Tuning cannot be held liable for any
damage caused by incorrect installation.
Tools needed: Jack, jackstand, 14mm, 12mm, 10mm sockets and rachet,
10mm flare nut wrench, 10mm wrench, hacksaw, various screwdrivers, a
c-clamp, and
pliers are
helpful. You'll also need some brake fluid to bleed the brakes, and
rags to keep clean.
1. Jack up the rear of the car and support it with jackstands.

2. Remove the hubcap and wheel.
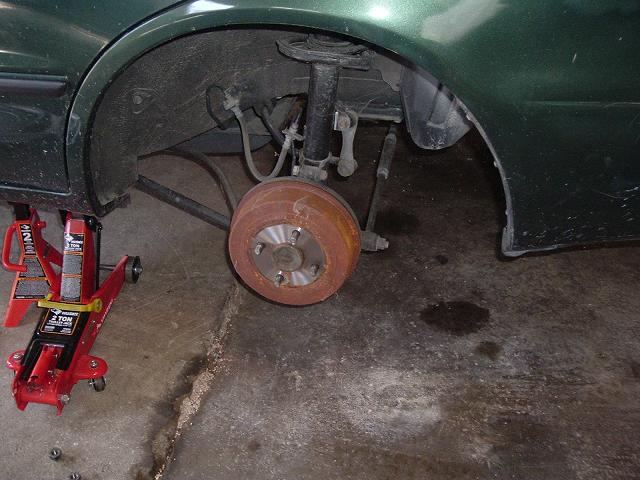
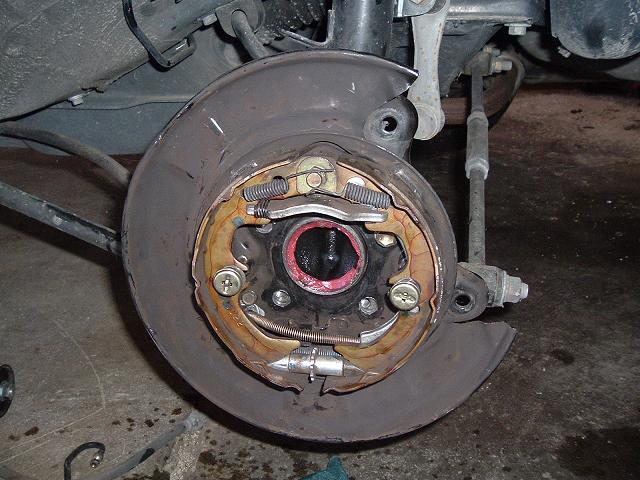
3. Remove the brake drum. If it will not come off, you will need to
remove the tab on the back of the backing plate, push the locking tab
with a screwdriver, and turn the star wheel with another screwdriver to
loosen the brake shoes.
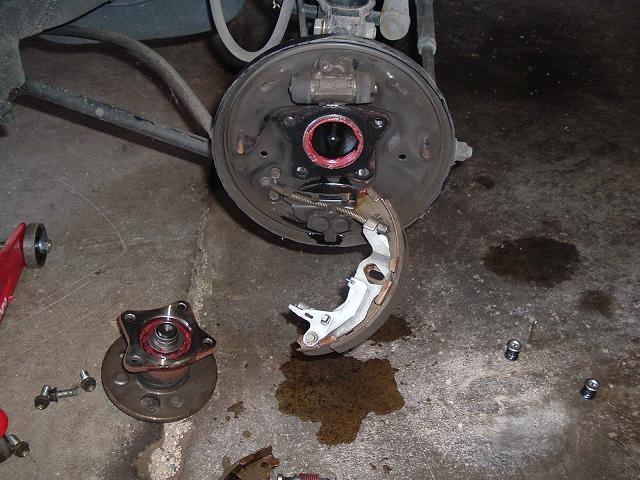
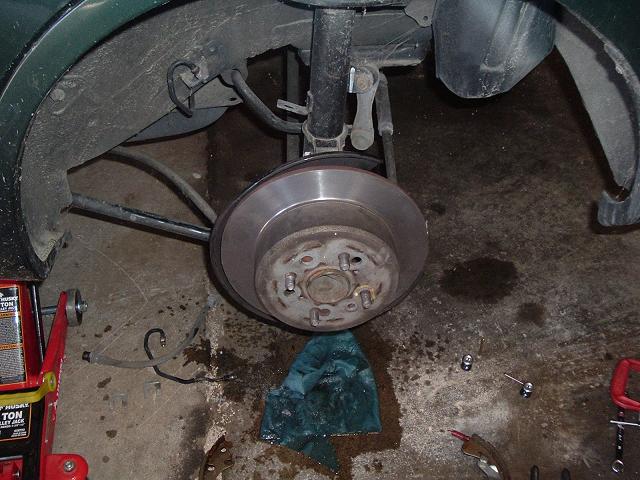
Then remove the hub with the four 14mm bolts through the access holes
in
the hub. When you remove the hub, you will find a large rubber o-ring.
The o-ring normally does not survive reinstallation and we have found
that it is not needed. You may discard it.
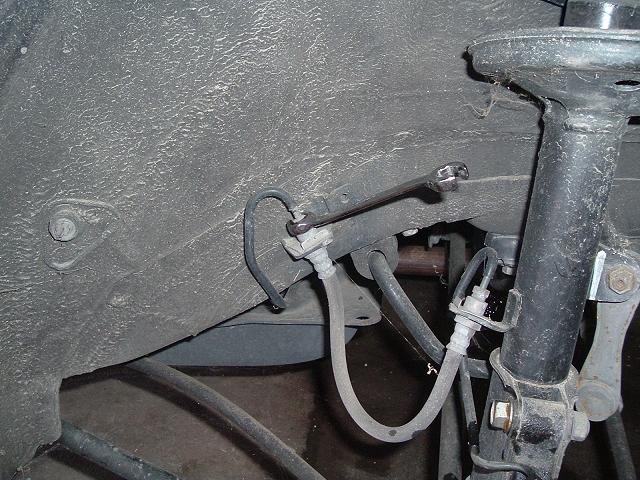
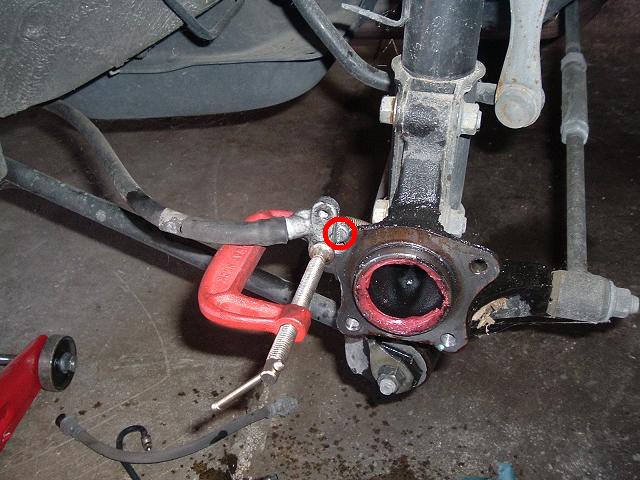
4. Using a flare nut wrench, loosen the 10mm flare nut attaching the
steel brake line to the backing plate as shown here. Fluid will leak
out for several minutes, so be prepared with a catch pan, rags, or some
"Speedi-dri". Brake fluid will damage paint in a matter of minutes, so
keep it cleaned off any painted parts. Please
note: You have now opened the
brake's hydraulic system. You must
bleed the brakes before driving the car again.

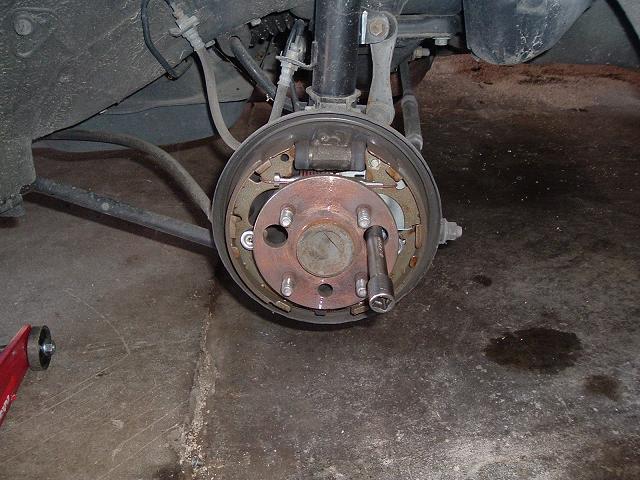
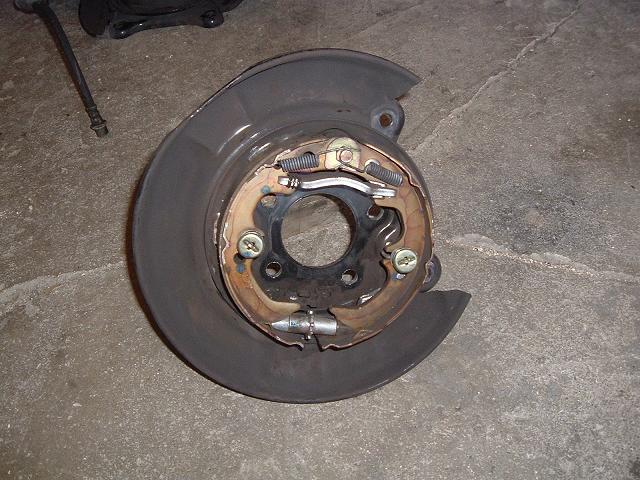
5. Remove the various springs and retainers, and then disconnect the
parking brake cable from the part behind the rear shoe. Then remove the
two 10mm bolts holding the parking brake bracker and remove the backing
plate.
6. At this point you can go ahead and remove the rubber brake hose and
the steel brake line by loosening the two 10mm flare nuts and removing
the two clips.
7. This is the one modification that must be made for the kit to work.
You must cut off the "ear" from the parking brake bracket. The bracket
is made of soft aluminum and is easily cut with a hack saw. You can see
here that I have used a c-clamp to hold the bracket firmly to the
knuckle. This will allow you to cut the bracket without it moving
around on you.
8. This is what it should look like when it is done:

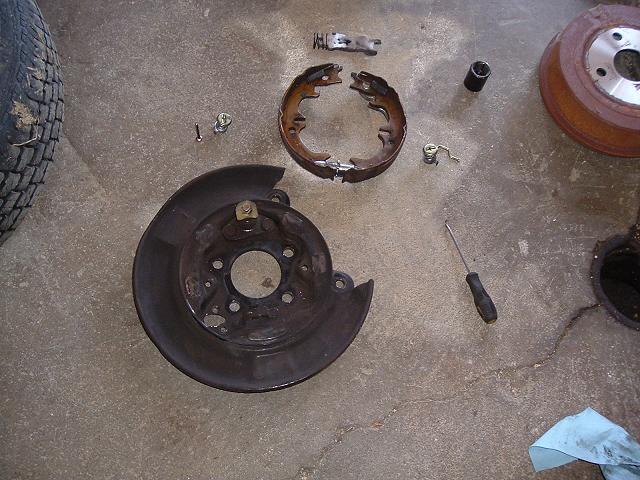
9. The Phoenix Tuning Rear Disc Brake Conversion is shipped assembled
so that you can see how it goes together, but you must disassemble it
to install it. Be sure to keep everything together so that you know how
it goes back together and you don't loose anything.
Technical Lesson
|
The '95 Toyota Celica parts that are used in this
conversion kit are designed with a dual disc/drum setup. The discs
brakes are used during normal braking, and the shoes and drum are only used for the parking brake. The
shoes are therefore never under the stress of normal braking, so they
should last the life of the vehicle. Replacement shoes are most likely
only available from Toyota if you should need them.
|
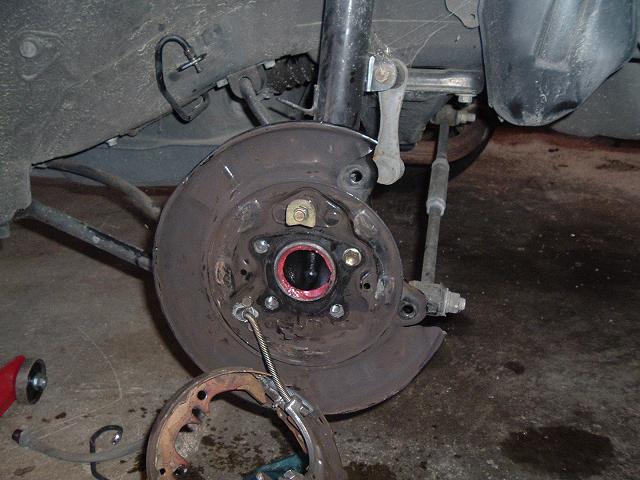
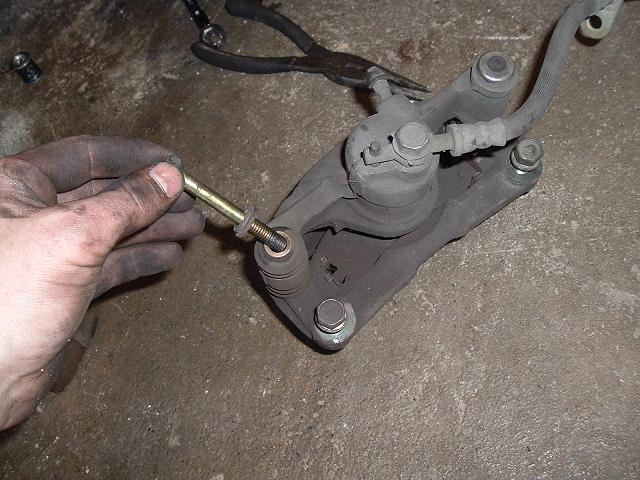
10. Now install the new backing plate onto the knuckle, and install one
of the 14mm hub bolts to hold it in place while you work on it. Pull
the parking brake cable through the backing plate and reinstall the two
10mm bolts holding it in place. Then
install the cable into the lever behind the rear parking brake shoe as
shown here.
11. Then install the rest of the parking brake shoe system. If you
forget, the curved spring clip goes towards the rear of the car.
12. Remove the bolt holding the backing plate on, and then install the
hub and tighen the four 14mm bolts. Don't tighten any of them all the
way until each of them have been started. You'll have to move the
backing plate around to get all three holes lined up.

13. Spray some brake cleaner over the shoes and other parts to ensure
they are nice and clean. You may now install the brake rotor. The whole
shoe assembly may
sit off towards the rear of the car a little and make it hard to put
the rotor on. Move it around to get the rotor on all the way. Note: If the rotor is very hard to
turn at first, don't worry, this is normal. The parking brake cable is
a little too long will be tightened up to make up for it.
14. Now it's time to install the calipers. They come loaded with the
pads but it will be easier to install the with the pads removed from
the assembly. First you must loosen the long 12mm bolt at the bottom of
the caliper assembly.
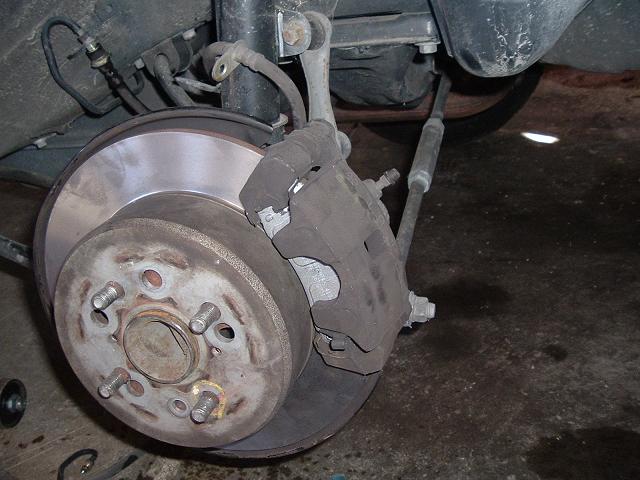
15. Now install the caliper assembly (less the pads) on the rotor and
tighten the two 14mm bolts that hold it to the backing plate. (The
bolts go through the backing plate and thread into the caliper bracker
assembly).

16. Install the pads and then close the caliper around them. Tighten
the long 12mm bolt holding the bottom of the caliper assembly.
17. Install the rubber brake hose into the bracket that held the old
rubber hose and secure it with the old clip, and then tighten the flare
nut into the hose. The other bracket does not fit anywhere, a simple
fix is to zip-tie it to the old bracket on the strut to keep the brake
hose out of the way. Take this time to spray the rotor surface with
brake cleaner to ensure there isn't any grease or fluid on it. You now
have rear discs!!! Go ahead and install
the wheel with two lug nuts for the parking cable adjustment.

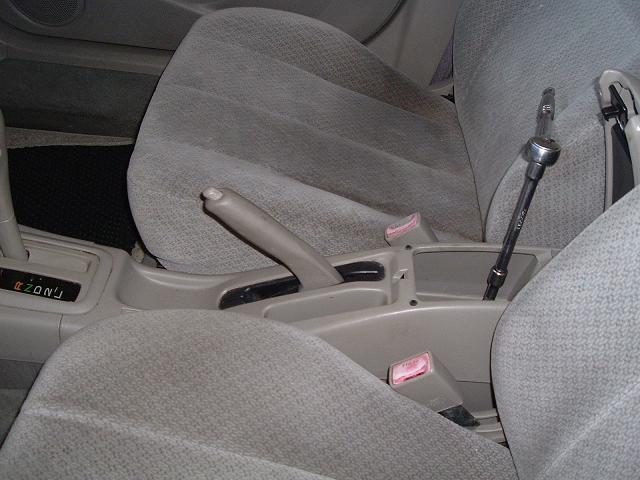
18. Now repeat the process for the other side. Once that's done, the
parking brake cable must be tightened up some. To access the adjustment
nut, remove the middle console. There are two 12mm bolts at the bottom
of the storage box and two phillips screws at the front of the console.
Pull the parking brake lever up and then remove the console by pulling
it up and back.
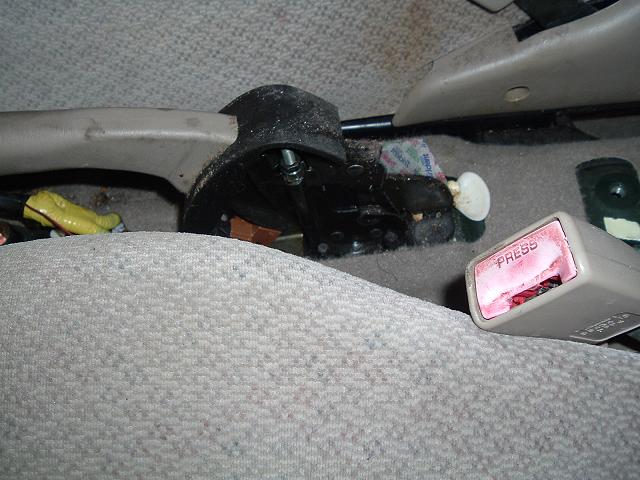
19. The adjustment nut is located here, it has two nuts on it, the
bottom one adjusts the tension on the brake cable and the top one locks
it into place so it doesn't move. You'll need two 10mm wrenches, one on
the top and one on the bottom. Loosen the top one and back it away,
then you can procede with tightening the parking brake. The rule of
thumb is that it should be adjusted so that the wheels will not move
when the brake handle is pulled up 5-7 clicks or so.
Because of the length of the cables, you will probably have to tighten
it up a bit so that the parking brake shoes are in the right spot. What
I like to do is tighten the cable way
up, and then work back from there until the wheels turn okay.
It's normal for them to be a little tight at first, the parts tend to
find their place after a bit. Once you get the adjustment right,
tighten the lock nut and reinstall the center console.
20. Bleeding the brakes: Fill the brake resevoir. Make sure that the
level does not get too far down or you will have to start over. Start
at the rear passenger wheel, then the front driver wheel, then the rear
driver wheel, then the front passenger wheel. Keep going in sequence.
Raise and support the vehicle, at all four corners at the same time if
possible (this will make it go a lot faster). Remove the wheels. Attach
a rubber line to the brake bleeder, and put the other end of the line
into a small container with a small amount of brake fluid it in. Have
an assistant pump the pedal 2 or 3 times and hold. Open the bleeder
screw and allow the fluid and air to come out. Tighten the bleeder
screw, then your assistand can let off the pedal. (The pedal MUST stay
depressed the whole time the bleeder screw is open.) Continue to check
the fluid level in the resevoir as you repeat the bleeding process
until no more air will come out, then go to the next wheel. I find that
normally I have to go around to each wheel a couple of times before I
get all the air out. Once the brakes are bled, tighten the bleeder
screws and install the wheels, and lower the vehicle.
Now take it easy at first, checking carefully to make sure there are no
problems or leaks before taking the vehicle into traffic. Enjoy your
new rear disc brakes! If you have any problems, feel free to email me
at drtweak@phoenixtuning.com.
|
|